Duct Restoration Services—Sealing, Encapsulation & Cleaning
Fix comfort issues, cut energy waste, and protect your air. We specialize in Aeroseal® duct sealing, Duct Armor under-slab encapsulation, and professional duct cleaning.
– Select a service above to learn more about how it works –

Aeroseal® Duct Sealing
Seal hidden leaks from the inside—reach what tape and mastic can’t.
How Aeroseal® Works.
Step 1 – Prep & Test
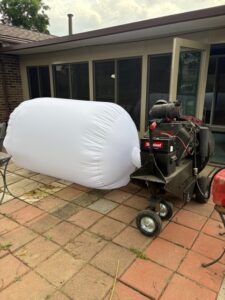
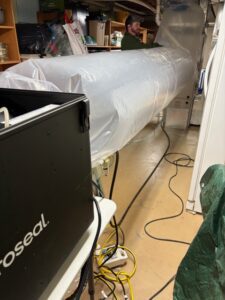
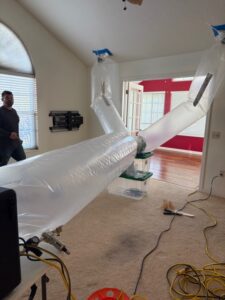
Block vents, attach the Aeroseal machine to the duct system, and run a pre-test to measure air leakage. (This gives a baseline reading for how much air your system is losing before sealing.)
Step 2 – Seal & Measure
Aeroseal’s aerosolized sealant is injected into the ducts and automatically seals leaks up to ⅝ inch wide. Live monitoring software tracks the reduction in leakage in real time.
Step 3 – Enjoy Results
Once sealing is complete, ducts are unblocked and a final test confirms improved airflow. Homeowners receive a printed certificate showing before-and-after results.
Aeroseal® – FAQ
Duct Armor® Under-Slab Lining in Ohio
Eliminate Musty Odors, Moisture & Mold Risk — Without Tearing Up Your Floors
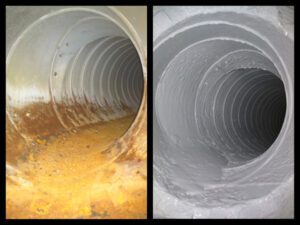
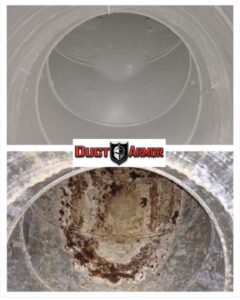
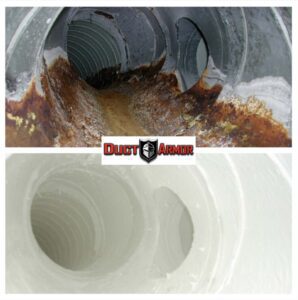
If your home smells musty when the heat or AC turns on, your under-slab ductwork may be rusted, leaking, or holding moisture. Over time, water intrusion in concrete-embedded ducts can lead to mold growth, foul odors, and poor indoor air quality.
Duct Armor® lining restores damaged under-slab duct systems by sealing out moisture, encapsulating contaminants, and stopping odor issues at the source — without demolition.
Why Homeowners Choose Under-Slab Duct Lining
How Under-Slab Duct Lining Works
Step 1 – Inspect & Prepare
We perform a camera inspection to identify rust, standing water, deterioration, or microbial growth. The duct system is cleaned and dried to ensure proper adhesion.
Step 2 – Apply Duct Armor® Lining
A high-adhesion epoxy coating is sprayed through each duct run. The coating forms a seamless, rubber-like inner liner that seals leaks, blocks moisture, and traps odor-causing contaminants.
Step 3 – Cure, Close & Verify
The system cures (typically same-day or overnight). We complete a final camera inspection and airflow check to confirm the ducts are sealed and restored.
Duct Armor® Under-Slab Lining – FAQ
Professional Duct & Dryer Vent Cleaning
Remove dust and debris so your system breathes easier—great before sealing or lining.
How Professional Duct & Dryer Vent Cleaning is Done
Step 1 – Inspect & Protect & Set Up
We walk through the home, camera-inspect ducts (including under-slab runs) and the dryer vent line, protect floors and vents, remove registers for cleaning, and isolate the system. A high-powered negative-air HEPA vacuum is connected; if needed, access openings are created at the trunks. (This protects the home and sets strong airflow for source-removal cleaning.)
Step 2 – Brush/Whip to Dislodge Debris
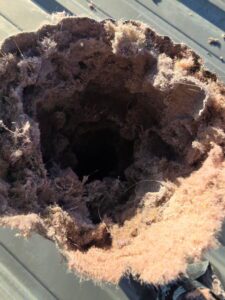
Using rotary brush and/or air-whip tools, every supply and return branch and the main trunks are cleaned from registers back to the plenum. Dust, pet hair, construction debris, and surface rust are broken loose; under-slab runs are cleaned end-to-end with flexible tools. Dryer vent lines are brushed and cleared to remove lint buildup. (Blower/coil cleaning is available as an add-on if needed.)
Step 3 – Extract, Sanitize (optional) & Reassemble
Debris is continuously pulled out under negative pressure and captured through HEPA filtration. If odors or contamination warrant, an EPA-registered sanitizer/deodorizer can be applied per label directions. Registers are reinstalled, access points sealed, dryer vent airflow verified, and a final camera check/airflow read is completed—then we provide before/after photos and care tips.
Professional Duct Cleaning – FAQ
Ready for comfort & lower bills?